Natural dyeing is pretty much witchcraft. I don't know why anyone pretends otherwise. You forage for things in the fields and woods, and then boil everything in a cauldron of poison. My incantations run more along the lines of "horseshoe of iron and bark of crabapple" than "eye of newt," but you get the idea.
A few weekends ago, I got together with my coven, I mean friends, for some natural dyeing. We foraged, concocted toxic brews, and transferred color from nature onto silk and cotton. You can get as earthy as you want with natural dyeing--India Flint, the patron saint of earthy dyeing, gives tips on using urine, dung, and blood, and encourages compost dyeing. But my friends and I decided to take advantage of scientific progress and follow the motto of "better living through science." The compounds that are useful for dyeing can come from urine, but a bottle of ammonia works too.
 All joking aside, eco-printing on silk really is my absolute favorite way to dye. Eucalyptus, rose leaves, and ferns are my favorite plant materials, and knowing the science doesn't make the colors they produce any less magical. This is my basic process:
Materials and equipment (do not reuse equipment for food):
|
|
Scour and mordant:
- Weigh scarves
- Scour scarves in hot water and synthrapol (or Orvus paste) overnight, squeeze out excess water
- In a heat-resistant bowl or beaker, measure alum at 15% weight of fiber (WOF) and cream of tartar at 8% WOF
- Add boiling water to alum and cream of tartar, swirl or stir to dissolve
- Add solution to pot of water, stir
- Add scoured and cooled scarves, heat to 180 degrees Fahrenheit, and cook for at least 1 hour, stirring occasionally. Let cool in pot.
- Hang the fiber to dry, rotating it to ensure the mordant distributes evenly
Printing:
- Lay out a sheet of plastic wrap along the length of the table
- Place a scarf on the plastic wrap, making sure that the fabric is face up, smoothing out any wrinkles
- Scatter leaves and petals only on one half of the scarf
- Fold the rest of the scarf carefully over the other half, sandwiching the plants
- Fold the plastic wrap over the scarf sandwich
- Starting at the folded seam, roll up the scarf against the dowel, as tightly as possible
- Wrap the bundle in another layer of plastic wrap
- Steam over hot water for at least an hour, and let cool overnight
- Peel off plastic wrap (this is the hardest part of the entire process, because the plastic wrap will have fused to itself--if you must use scissors, cut carefully so you don’t cut the scarf), and discard plant materials
I let the scarf dry fully, and even iron it before rinsing. I can’t prove it, but I think it helps to set the dye. If the colors look weak, I’ll give it a dip in a jar of iron liquor (iron things plus vinegar and water), or a weak ammonia solution to bring out some of the color.
Dyeing plant fibers isn’t something I’ve done before, mostly because I’ve never been able to find pure washing soda. My friends were able to find it at a hardware store, and they brought the box, and plenty of cotton pieces, so really, I had no more excuses. We bundled and we printed by pounding, but in the end, the dyes weren’t fast. What little color was visible ended up rinsing out, leaving only the faintest stains.
After my friends left, I had leftover plant matter and virtually undyed fabric. The scouring is a fairly straightforward process (boil with washing soda, then with synthrapol), but there are many options for mordanting cotton, and the options can be combined--and/or repeated in any combination, and/or aged between each step--for even more possibilities. My very basic understanding is that in order for dyes to adhere, fiber needs to become ingrained with a metal salt. Protein fibers have a molecular affinity to metal salts, so when dyeing wool and silk, I use alum and cream of tartar because they’re the least toxic. But for best results, cellulose fibers should be pre-treated with an intermediary such as tannic acid, or a protein solution like soy milk.
I re-boiled the cotton pieces with 20% alum and 8% cream of tartar. Red and blue flower petals, along with berries, grapes, red cabbage, and other red/blue plants derive their color from the glycosylated form of anthocyanin, a hydrophilic pigment in the phenolic group. The only word in that previous sentence that has any meaning for me is “hydrophilic.” Because that means that the pigment is water soluble, which means that it washes out. But, it reacts spectacularly to changes in pH, going from red in acidic conditions, to blue in alkaline. I had half a dozen red roses left from the weekend, so I couldn’t NOT try.
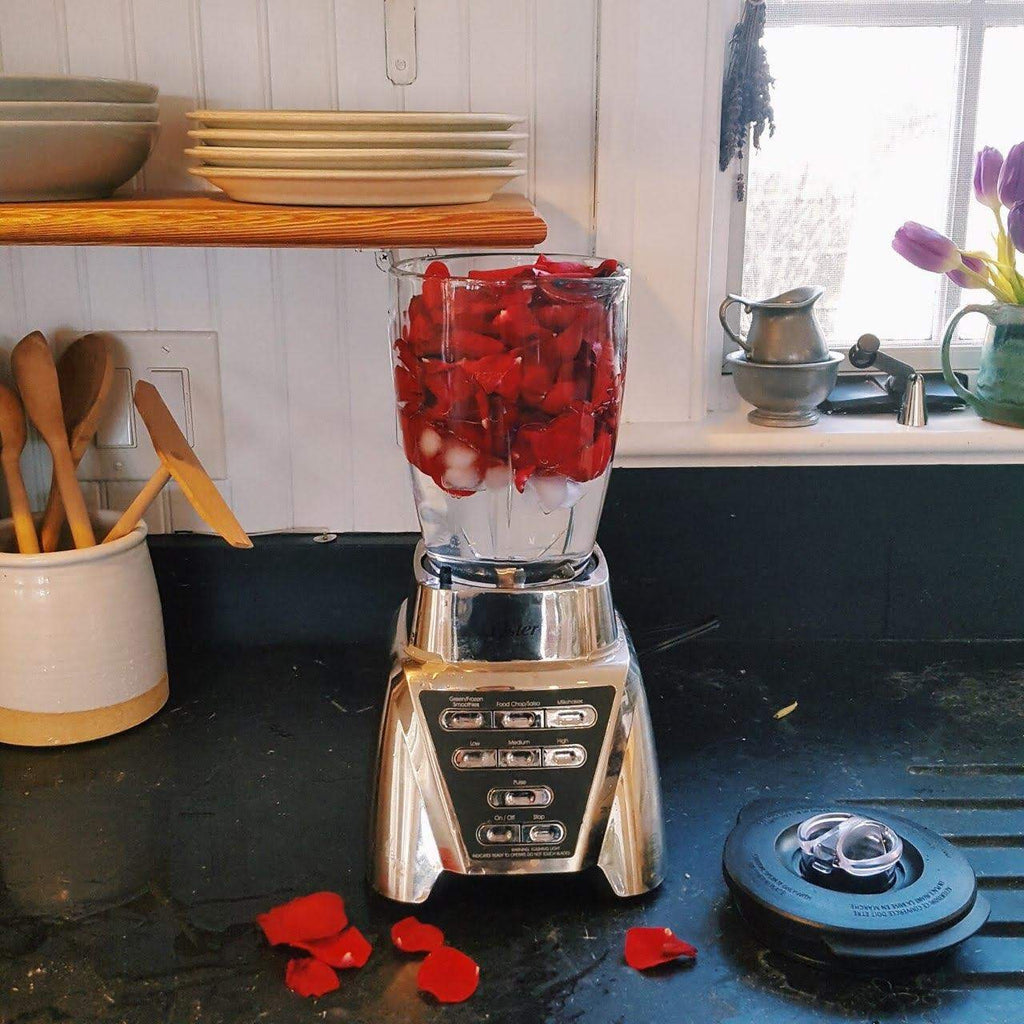
I picked all the petals off the roses, and pureed them with ice and water. I was shocked to see the red petals turn into the most beautiful purple sludge I’ve ever seen.
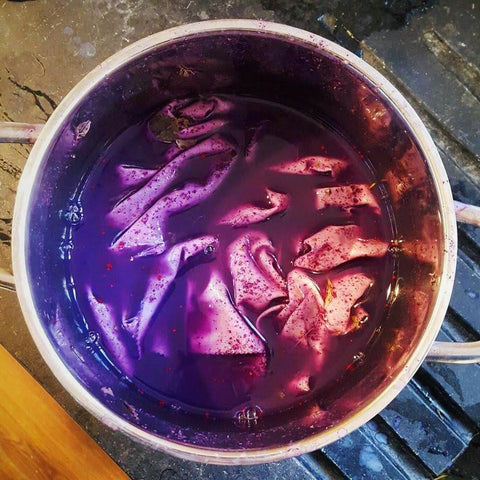
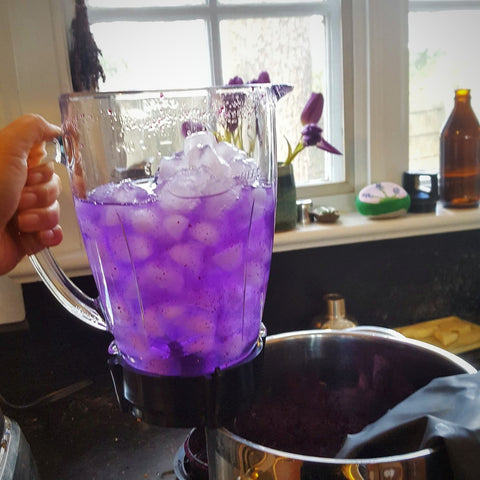
The picture below shows the electric ultra-violet of the diluted puree. I submerged the fabric, and couldn’t resist swishing it around. After only working with wool and silk, it was thrilling to know that no amount of poking and agitating could make it felt.
Even after an overnight soak, all the color ran out when I rinsed with cold water. I wasn’t excited about gathering oak galls in the woods for tannin, but I did happen to have a tin of whole-leaf green tea. I boiled the tea, took out the cotton pieces from the rose petal sludge, and steeped it with the green tea. The color went from pale violet to a violet-tinged green, which is as weird as you’d imagine. I guess it was khaki? I decanted some of the rose-purple sludge into a glass jar, and added a tablespoon of ammonia. As I swirled, the purple transformed into turquoise. I put one of the small squares in, and left it overnight. I put the rest of the fabric back into the rose sludge, added half a cup of vinegar, simmered it for 2 hours, and left everything overnight.

The next day, I fished out the pieces, hung them to dry, and ironed them before rinsing. Even the ironing was dramatic. I ironed the small square that had been in the rose/ammonia bath first, and then I started to iron the square that had been in the rose/vinegar bath. I spilled a little water on it as I was refilling the steam tank of the iron, and as I ironed, the water splotches turned the fabric green. In retrospect, I guess I should have waited for my iron to cool, then cleaned off all traces of ammonia before ironing the rest of the fabric.

I rinsed out the entire square until the water ran clear. I ironed it again, then ironed the other large square. As I ironed, dark purple lines bloomed in the fabric. I assume that was how the fabric was folded while being mordanted? I think I need an upgrade in cauldrons.

After ironing everything, I rinsed all the pieces except the other small square that had been boiled in the rose/vinegar.
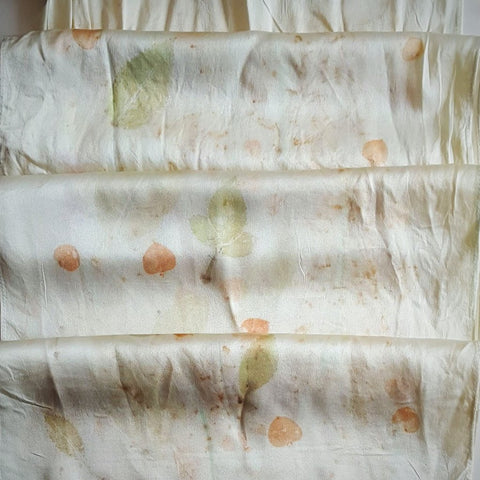
When dry, the small square that had been in the rose/ammonia bath was a pale greyish-green, and the rest were a muted violet, with the one large square that I rinsed before ironing noticeably paler than the other large square. After a week, the all the colors have shifted, except the small square that I haven’t rinsed yet. The small square from the rose/ammonia bath is now a yellowish khaki, and the large square that I’d rinsed before ironing is tan, and the water splotches that were green are now the same yellowish khaki as the small ammonia square. The other large square boiled in rose/vinegar is a violet-tinged khaki. The stark purple lines that bloomed when I ironed have disappeared, but the center crease is still faintly violet. The small square boiled in rose/vinegar, the one that I haven’t rinsed yet, is the same shade of pretty violet. I know I have to wash it at some point, but it’s fun to have as a contrast.
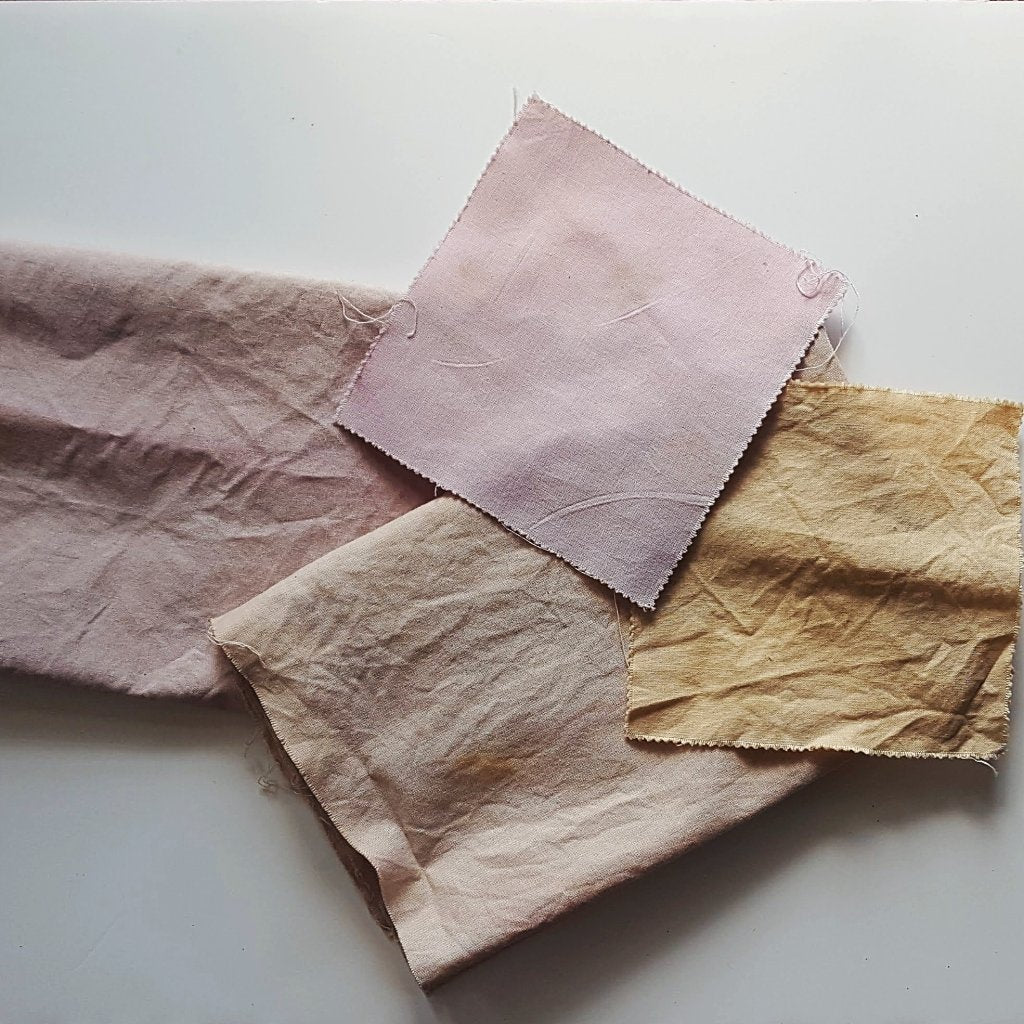 From left to right: Rose petal/vinegar, rose petal/vinegar but rinsed before ironing, rose petal/vinegar unrinsed, and rose petal/ammonia
 From left to right: Rose petal/vinegar, rose petal/vinegar but rinsed before ironing, rose petal/vinegar unrinsed, and rose petal/ammonia
I dyed some wool and silk ribbon in the rose sludge too, but I’m going to let that cure a little longer before rinsing.
There are certainly more stable and dependable dyestuffs out there, but dyeing with rose petals was dramatic and exciting. Also, the pureed rose petal sludge smelled exactly like a fresh blueberry smoothie.
Recommended plants for printing:
- Ferns - brownish-green; bronze with iron post-mordant
- Rose leaves - dark green; grey with iron post-mordant
- Apple and crabapple leaves - peachy orange from new spring leaves
- Citrus leaves - bright green
- Eucalyptus - orange
- Onion skins - dark orange/brown
- Wild violet leaves - dark purple
- Astilbe leaves and stems - reddish pink
Comments on post (1)
Nancye says:
What fun. I love magic in the kitchen. One of these days I’m going to have to make it to your farm and play with you.
Leave a comment